Apparently, one of the main cons on having the Yui Figma
is that you will have to deal with Water Slide decals. And on
top of that among the many expressions in the decals to choose from,
you only had to choose 1, cause it will only provide you 1 chubby plate
and another palte over if you will be getting Nodoka's Ex Figma.
Now, here's a request from a friend - a figma buddy. To create a tutorial
on how to apply those waterslide decals. My first tutorial so I won't be calling
it official. At the same time, her request was a video but I'am too shy to create
one since my speaking is bad. And Yes, this is applicable into other kits too such as
Gundams that are using Waterslide Decals.
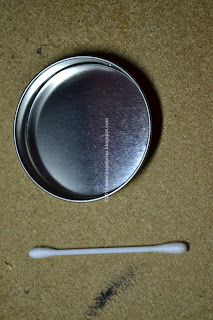
To Top It all, first we must prepare materials we might need:
- Water
- Water Basin
- Scissors or Cutting Knives - [Remember: Ask an Adults Assistance when handling such tools - If you'r already an Adult ask another adult *laughs*]
- Tweezers
- Ear Buds or Cotton
- A clean cloth
- Clear Top Coat Matte - Optional
Upon preparing the necessary materials we can now start.
Prepare the Faceplates. Where to get these Faceplates?
- 1 Included in Yui's Figma
- 1 included in Nodoka's ExFigma
- Create Your Own Resin or Mold
Clear the Surface of the Faceplate, Wipe it with Clean Cloth to ensure it's flat and clear of Dirt and Dust
Included in both Packages, are Instructions on how to install the decals. I don't Speak
Japanese but I can try to Interpret it.
- Cut the desired Part in the Decal Sheet.
- Soak the Decal in Water in 10-15 Seconds.
- Slightly, slide half the decal from the paper.
- Then, stick the decal in the Faceplate and slowly slide the paper underneath to fully stick the decal.
Tha's what I understood in that paper - moving on.
Choose you desired Decal.
Cut the desired decal into pieces.
Prepare Water in a small plate and some Ear buds or Cotton.
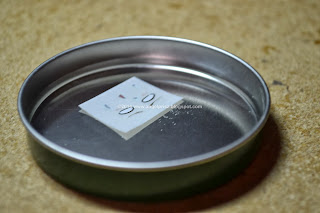
Soak the decal in the Water for 10-15 Seconds untilthe decal lifts.
Oversoaking might fully lift the decal - and the decal might torn.
If Oversoaking occured - gently, grab the decal while floating in water with some tweezers and gently placed it on the faceplate.
If Oversoaking didn't occured - lift the decal, and slide it a little so a part of it would stick in the faceplate.
When a part of it already stick, kindly slide the remaining cardboard underneath and slowly place the decal.
Just like so - then use an Ear Bud to flatten and absorb the excess water in the faceplate, Rememeber - Gently - to avoid tearing the decal up.
Now, actually it would already be fine looking like that but to ensure decal placement. Spray a clear top caot matte in the faceplate
to fully stick the decal but since I forgot to grab one in a local store I sprayed a clear primer
instead - but don't do that! I have my own ways in spraying primers :).
So, there you go - decals placed. If you have questions you can send me a message here or comment in the post below.
...
Hope you guys learned something in my Semi- Small -Tutorial - Ciao~!


No comments:
Post a Comment